Getting started and workspaces
A workspace is where your pages live. Choose between the one on this device and one in the Cloud, then use the sidebar to group, nest, star and — when it comes to it — recover them.
Local, Cloud, and what changes between them
The Local workspace is the device itself — always there, signed in or not, online or not. It is not a workspace anyone named, so the switcher shows it as On this device rather than under an account.
A Cloud workspace belongs to a signed-in account. It syncs, and everything that needs other people rides on it: members, live presence, comments, share links, and the notification inbox. Nothing in that list exists on Local, so those controls are not shown there rather than shown and refused.
The web build has no Local workspace at all. Selecting it is refused outright, not merely hidden, so a stale preference cannot drop the web app into a workspace it does not have.
- 1.Open the switcher at the top of the sidebar to see which workspace you are in.
- 2.The line under the name says either On this device, or the account and your role in that workspace.
- 3.A Local page can be sent up later: its ⋯ menu offers Move to Cloud whenever Local is active and you have at least one Cloud workspace.
Sign in, switch account, switch workspace
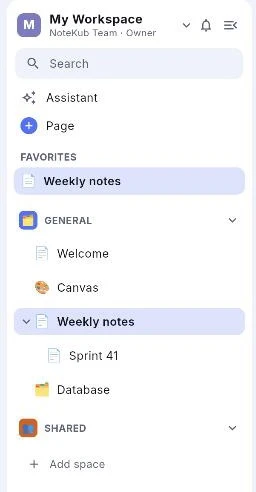
The switcher menu is one list built in layers: the workspaces of the account you are acting as (plus Local), then Create workspace, Rename and Manage members, then the accounts themselves.
More than one account can be signed in at once. Switching account changes which workspaces are listed — a workspace you reach through two accounts is viewed through whichever one you switched to, because your role may differ between them. An account whose session could not be restored stays visible reading Signed out · tap to sign in, so it never quietly disappears.
Your role is shown beside every Cloud workspace: Owner, Member, Guest or Viewer. Owner and Member may change content and structure; Guest may comment; Viewer reads. The UI hides what your role cannot do, and the server enforces the same ladder regardless of what the UI offers.
- 1.Click the workspace name at the top of the sidebar to open the switcher.
- 2.Pick Sign in to Cloud, or Add another account when one is already signed in.
- 3.Choose Create workspace to start a new owned one, or Manage members to see who is in the current one.
- 4.Double-click the workspace name in the sidebar to rename it in place.
Group the top level into spaces
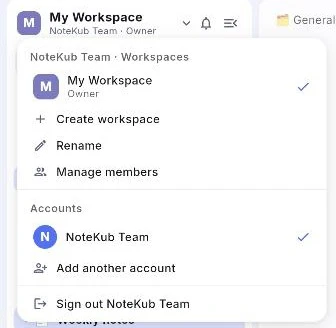
A space is a named, coloured grouping of top-level pages — General and Shared, say. It holds no content of its own: each root page simply records which space it belongs to, which is why moving a page between spaces changes nothing about the page.
Space headers are the small-caps grey rows in the sidebar. Each one folds, takes a dropped page, and carries a hover-revealed + for a new page and a ⋯ for the rest.
- 1.Use Add space at the bottom of the tree to make one.
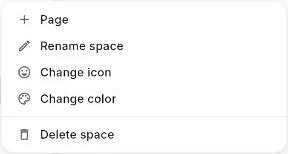
- 2.Double-click a space header to rename it, or use ⋯ → Rename space.
- 3.⋯ → Change icon sets an emoji badge; without one the badge is the first letter of the name.
- 4.⋯ → Change color opens a colour wheel for the badge.
- 5.Drag any top-level page onto a space header to move it there.
Create pages, tables and canvases
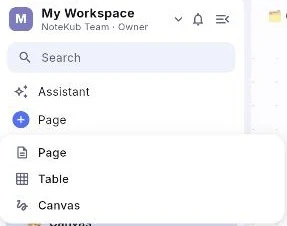
The create button sits near the top of the sidebar, under Search and Assistant, and is labelled simply Page. Its menu offers three kinds: Page, Table and Canvas. There is no template gallery behind it — the three kinds are the three kinds.
The same three appear again under any existing page, as Add subpage, Add subgrid and Add subcanvas, on the hover-revealed + at the right of a row. A subpage made this way also links itself back into the parent's document, the way typing /page does, so the parent still reads as a complete document.
- 1.Click Page under Assistant, then choose Page, Table or Canvas from the menu.
- 2.Press ⌘N or Ctrl+N for a new page without leaving the keyboard.
- 3.Hover a page row and press + to add a child, or use the space header's + — its ⋯ menu offers the same thing as Page.
- 4.A newly created page opens in a quick-look peek rather than taking over the screen.

Arrange the tree
Dragging a page gives three answers, drawn three different ways. A line across the top of a row means above it, a line across the bottom means below it, and a filled outline around the whole row means inside it, as a child. The zones are the top quarter, the bottom quarter, and everything between.
The chip you drag is lifted clear of the finger rather than sitting under it, so on a touchscreen the row whose line answers the question is not the row your hand is covering.
Below the edit tier a row is neither draggable nor a drop target. A drag that springs back reads as a broken tree, so it is not offered at all.
- 1.Drag a row and watch which of the three marks appears before letting go.
- 2.Or use ⋯ → Move up and Move down to shift a page one place without dragging.
- 3.Double-click a page title to rename it in place; click its icon to change it.
- 4.⋯ → Duplicate copies a page and opens the copy's name for editing straight away.
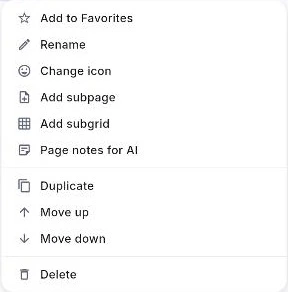
Favorites
Starring a page lifts it into a FAVORITES section above the spaces, so the pages you are actually in stay one click away however deep they sit.
Favorites are stored in the shared page tree, not per device — in a Cloud workspace a star is part of the structure everyone sees, which is also why a Viewer cannot set one.
- 1.Hover a page row, open ⋯, and choose Add to Favorites.
- 2.The same menu reads Remove from Favorites once the page is starred.
- 3.In the FAVORITES section itself, the star at the right of a row unstars it directly.
- 4.The star at the right of an open page's top bar does the same thing without going near the sidebar.

Trash, and getting things back
Deleting a page moves it to the trash; nothing is destroyed at that point. The sidebar footer carries Trash with the count in brackets, so how much is waiting there is visible without opening it.
Trash opens as a table — file name, last modified, created — rather than a second tree. Restoring returns a page to the spot it was deleted from, not to the root.
- 1.Click Trash at the bottom of the sidebar.
- 2.Use the restore arrow on a row to bring one page back, or the bin icon for Delete forever.
- 3.Restore All and Delete All sit in the dialog header, and appear only when the trash has something in it.
