NoteKub guide
Settings and data
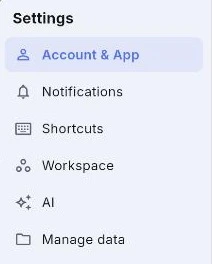
Settings is six sections down a left nav: Account & App, Notifications, Shortcuts, Workspace, AI and Manage data. Which of them you get depends on where you are — a Local workspace has no notifications to configure and no cloud to bill.
Account & App
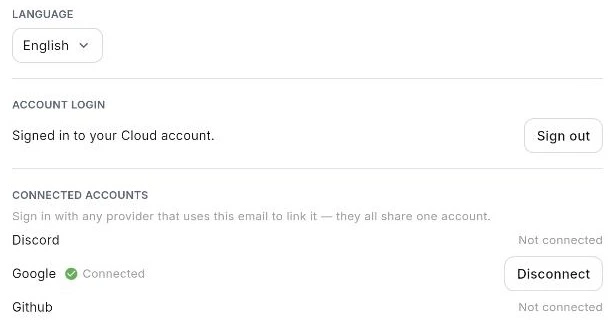
Language switches the whole app between English and Thai. Under it, Account login says whether you are signed in to Cloud and offers Sign out, or Log in when you are not — and says This build is local-only (no Cloud) where there is no backend to log in to.
Connected accounts links sign-in providers to the same email, so you can come back through whichever one you have to hand. Each row reads Connected with a Disconnect button, or Not connected.
- 1.Open Settings from the gear at the bottom of the sidebar.
- 2.Choose Account & App.
- 3.Pick a language, sign in or out, and link the providers you use.
Notifications
A grid: the event types down one side, the channels across the other. Email and Mobile push each get their own switch per event.
Six events can be routed: when someone mentions me, replies to my comments, other comments on threads I'm in, workspace invitations, pages shared with me, and changes to my access.
The line at the top is the important one — the inbox always records everything; these control what also reaches you elsewhere. Turning a switch off does not stop the bell from lighting up.
It is Cloud-only. On Local the tab says to sign in to a Cloud workspace first, because there is no server to send anything.
- 1.Open Settings → Notifications.
- 2.Find the event you care about.
- 3.Turn Email or Mobile push on or off for it.
Shortcuts — the two that move
Almost every shortcut in NoteKub is fixed. Two are not, and this is where they live.
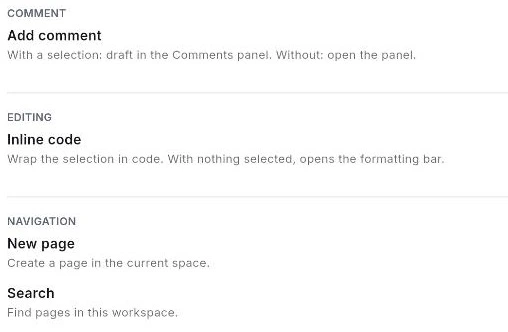
Add comment, under Comment: with a selection it drafts in the Comments panel; without one it just opens the panel. Inline code, under Editing: wraps the selection in code, and with nothing selected opens the format instead.
Under Navigation the tab also lists what cannot be changed, so the page is a reference as well as an editor: New page at ⌘N, Search at ⌘P.
Rebinding opens a Press a shortcut prompt — press the combination, or Esc to cancel — and each row has a Reset back to its default.
- 1.Open Settings → Shortcuts.
- 2.Press the chord beside Add comment or Inline code.
- 3.Press the new combination, or Esc to back out.
- 4.Use Reset to put a default back.
Workspace
Appearance is the theme: Light, Dark or System.
That is the whole tab. Everything else about a workspace — its name, its members, its spaces — is edited where it lives, in the switcher and the sidebar, rather than collected here.
- 1.Open Settings → Workspace.
- 2.Choose Light, Dark or System.
- 3.System follows whatever the operating system is set to.
AI
The AI tab appears only where there is an assistant to configure. It holds the API key that pays for your own use, the usage table underneath it, the local-model panel on desktop, and the MCP address for outside assistants.
All of it is covered in [[ai]] — including why the usage table is counted in tokens and never in money.
- 1.Open Settings → AI.
- 2.Add an Anthropic key, or an OpenAI-compatible key and address.
- 3.Read Usage below it to see what the tokens went to.
Manage data, on a Local workspace
File storage location says where the documents are: on this device, no account or network needed.
Backup your workspace saves a snapshot of everything to a JSON file — the button reads Backing up… while it works and then names the file it wrote. It is a snapshot, not a sync: it captures the workspace as it was when you pressed it.
- 1.Open Settings → Manage data.
- 2.Read the storage location so you know what you are backing up.
- 3.Press Backup and keep the JSON file somewhere safe.
Manage data, on a Cloud workspace
There is no local folder and no snapshot button, and the tab says why: this workspace is stored in the cloud (NoteKub backend).
Getting content out of a Cloud workspace is a per-page job rather than a workspace one, and what the page's own ⋯ menu offers depends on what kind of page it is. A document gives Export Markdown, Export HTML and Import Markdown. A canvas adds Export PNG and Export SVG. A database adds Export CSV — a header row of field names, then one row per record.
- 1.To take one page out, open it and use ⋯ → Export Markdown or Export HTML.
- 2.To bring one in, use ⋯ → Import Markdown.
- 3.The same menu carries the Full width toggle for the page.