NoteKub guide
AI assistant
Two different things share the sparkle icon. Ask AI rewrites the text you selected and hands it back for approval. The Assistant reads your pages and proposes changes you approve one at a time. Both spend your own API key, and NoteKub never guesses at what that costs.
Ask AI, on a selection
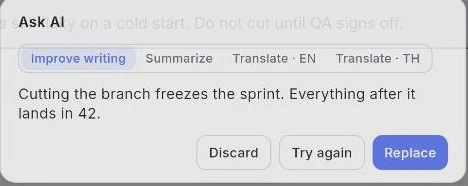
Select text and press the sparkle at the left of the selection bar. The dialog opens on four ready-made transforms — Improve writing, Summarize, Translate · EN and Translate · TH — and a free prompt box beside them. Both translation directions are always offered, whichever language you are writing in.
The result arrives as a proposal, never as an edit. While it is coming the button reads Writing… and Stop is available; when it lands you get Insert, Replace and Discard, plus Try again if it was not what you meant.
- 1.Select the text you want changed.
- 2.Press ✨ on the selection bar.
- 3.Pick a transform, or type your own instruction, then press Generate.
- 4.Choose Replace to swap the selection, Insert to add it below, or Discard.
The Assistant
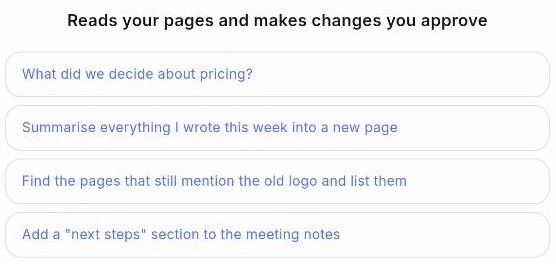
Assistant sits near the top of the sidebar, under its own line: reads your pages and makes changes you approve. It opens full screen, or docked beside the page when the window is wide enough to hold both.
It is a page rather than a dialog because of what it does. Something that only answered fits in a corner; something that reads across a workspace and proposes edits needs room to show what it read and what it is about to do.
When it wants to change something the message says Wants to make a change and waits behind two buttons: Make this change and Not that. After a change lands, a strip appears above the editor saying what it did, with Undo and Dismiss.
- 1.Press Assistant in the sidebar.
- 2.Ask a question, or tell it to do something.
- 3.Read the proposal, then press Make this change or Not that.
- 4.If you change your mind after it lands, press Undo on the strip above the editor.

Two scopes, on purpose
The sidebar's Assistant reads the whole workspace. Typing /assistant in a page opens the same assistant pinned to that page — its title says Assistant · this page and its subtitle says works within this page only.
The narrow one exists because a question about one paragraph should not cost a sweep of the workspace, and somebody asking from inside a page is usually asking about what is in front of them.
Neither appears where it cannot work: on a Local workspace, or on a server with no key configured, the row is simply absent rather than present and failing.
- 1.Use the sidebar's Assistant for anything that spans pages.
- 2.Type /assistant inside a page to keep it to that page.
- 3.On a narrow window the pinned one falls back to full screen.
Page notes for AI
A document's ⋯ menu in the sidebar offers Page notes for AI: standing context that travels with the page, so you are not re-explaining it at the start of every conversation.
A page that has them says so — This page has notes for the assistant.
The item appears on documents only. A note left on a database or a canvas would be written to nobody, so it is left out rather than shown doing nothing.
- 1.Hover a document in the sidebar and open its ⋯ menu.
- 2.Choose Page notes for AI and write what the assistant should know.
- 3.Press Save.
Your key pays for it
NoteKub is bring-your-own-key: what the assistant costs is billed by your provider, to you. The settings panel takes an Anthropic key, or any OpenAI-compatible endpoint — Groq, OpenRouter, DeepSeek, Together and the rest — where you also give the address, which must be https and reachable from the server.
The panel leads with whether the key has ever actually been spent rather than with a reassuring tick, because the failure it is guarding against is a key pasted wrong: it saves, it looks settled, and it fails the first time it matters.
Removing a key stops the assistant working until another is added. Nothing you have written is affected.
- 1.Open Settings and find the AI section.
- 2.Choose Anthropic or OpenAI-compatible.
- 3.Paste the key — and for OpenAI-compatible, the address — then press Save key.
- 4.Replace it later from the same panel, or press Remove.
Usage, counted in tokens
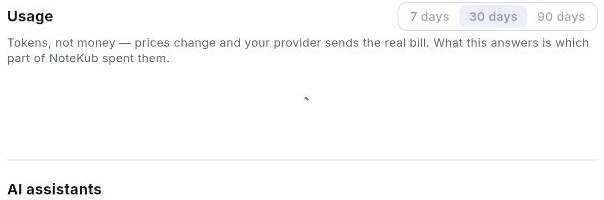
Under the key is what it has been spending. The table breaks the period down By feature and By model — which is the question your provider's bill cannot answer.
There is no currency figure anywhere, and that is a decision rather than an omission: prices change and differ per model, so a number here would be wrong the moment one did, and your provider already sends the real bill.
An unused period says Nothing yet in this period rather than showing zeroes.
- 1.Open the AI section in Settings and scroll to Usage.
- 2.Read By feature to see which part of NoteKub spent the tokens.
- 3.Read By model to see where they went.
A model on your own machine, and assistants from outside
Desktop only: point NoteKub at a model already running on this computer — Ollama, LM Studio, llama.cpp, anything serving an OpenAI-compatible address. Nothing you write reaches a provider. The address never leaves the device, and the server never calls it: 127.0.0.1 is whichever computer is asking, and the one running NoteKub's API is not this one. So the assistant's loop runs locally and only the tools go to the server.
It is honest about the catch — a model that cannot call tools will answer but not act.
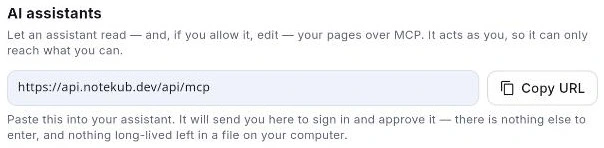
Pointing the other way, AI assistants lets an outside assistant read, and if you allow it edit, your pages over MCP. The panel is one address and a Copy URL button, with nothing to fill in. It acts as you, so it can only reach what you can — and paste the URL into your assistant and it will send you here to sign in.
- 1.On desktop, open Settings → AI and find A model on this computer.
- 2.Enter the address and press Use this model; Stop using it goes back.
- 3.For an outside assistant, press Copy URL under AI assistants and paste it there.